Showing posts with label Candle Tips. Show all posts

Thursday, September 20, 2012

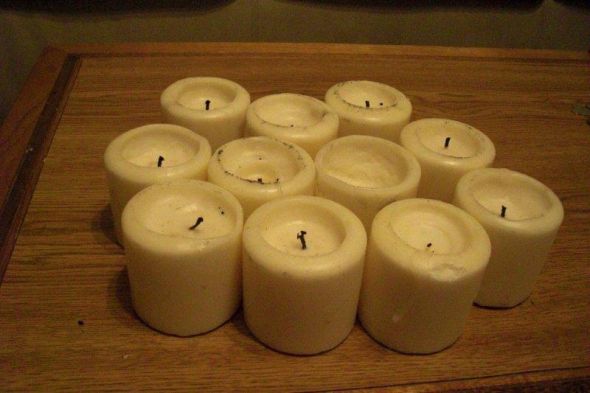
Candle placement

Q)  Is there a recommendation on how close your candles should be to each other?


A)  Yes there is.  

When grouping candles together, arrange them to be at least 2 inches apart 
for proper air flow that allows them to burn evenly
 (and last longer).


Wednesday, August 29, 2012

Anosmia


Anosmia - Loss of smell

Why is this important to know? Well, it is the reason why we seem to not be able to smell our favorite fragrance today when we just used it yesterday.  Our noses adapt to scents and adjust to them so that they don't smell them anymore.  We simply get used to it.  

Using different scents every day keep our noses from that adaptation.  That doesn't mean that you have to change your reed diffuser oil every day.  That would be just silly.  Try adding a complementary scent in a candle.  ex.  If your favorite diffuser oil is SeaSalt and Driftwood, you could complement that with a Twilight Sea candle one day and maybe an Amber Wood and Vanilla the next.  This will keep your nose enjoying the fragrance of your home every day! :)

Need to add more scents to your home? Check out all the different scents I have to offer you.  Invent your favorite combinations for your home.

Thursday, August 9, 2012

Are all Jar candles safe??

I know this may some what of a duplicate post, but I found this picture that tells a wonderful story.


Has this ever happened to you??

What caused this disaster?

Plain and Simple, the jar cracked!!

Now why did the jar crack?  Well high heat will crack glass.  The person who was burning this candle did NOT cut their wick.  How do I know this, well look at that massive build-up of soot at the top of the candle.  This can totally be prevented by simply trimming your wick to 1/4 inch.  

There are a few things that you need to consider when purchasing and burning jar candles.  

1) Shape of the jar.  

Notice the top of this jar.  It has a pretty abrupt curve inward.  At the top of this curve is almost a flat area, not completely, but almost.  This shape is in many of your less expensive candles.  This shape however holds in the heat! Heat gets trapped under the curve, heating the glass.  

2) Length of Wick

It is so important to trim your wick at EACH lighting!!  I have already said this a few times.  What I may not have said is that it is important for you to check your wick while burning your candle.  If your wick gets long while burning, snuff your candle, trim your wick, let the wax harden a bit and then re-light your candle.  A long wick adds more heat then the candle holder may be able to handle.

3)  Type of Wax

There are several types of wax used in making candles.  Some that you may know are soy, paraffin, gel and beeswax.  Some you may not know are bayberry wax, carnuba, ceresine and tallow.  Each of these waxes have a different melting temperatures.   Therefore the wick of these different wax candles will burn at different rates.  A wax with a high degree melt temperature may keep the wick shorter for a longer length of time due to the solid wax surrounding it.  Where as a wax with a low degree melt temperature will liquefy the wax quicker exposing more of the wick to burn increasing the heat inside of the jar.

4) Type of wick

Yes you know there are cotton wicks, wicks with lead in the center of them (I do NOT recommend using these), wood wicks and other fibers that may be used.  Did you know that there are several grades of each of these wicks.  (I have to say here that I can only speak as to what PartyLite's wick practices are.  I do not know first had of other candle manufactures) A wick needs to be specific to the candle, not just the size of the candle, but the composition of the candle.  PartyLite uses over 100 different wicks in their candles.  For example purposes here lets talk about a single wick jar candle.  A larger jar candle would need a larger wick then a smaller jar candle.  Picture the wick on a birthday candle vs. the wick on your dinner table taper candles.  The type of was also determines the size of the wick due to melting temperatures.  Additives also need to be considered when choosing the best wick.  Some coloring or essential oils used in making candles will change the melting temperature of the candle.  Therefore a Passion Fruit jar candle may have a different wick as a Plum Pleasure jar candle using the same size jar with the same amount of wax.


So you see it is not as easy as going to the store and buying a candle that you feel safe burning in your home. Some things that need to be considered you can see immediately in the store, others you cannot.  Here is where that old adage, "You get what you pay for" comes into reality.  Like I said before I can only speak for PartyLite candles, but lets think about it. Do you think that the jar candle, or any candle for that matter, that you may buy at the dollar store would have gone through all the testing and made with the same quality as a PartyLite candle (or other major candle manufacturers)???  

The choice is yours!!

This?


Or This?

Thursday, August 2, 2012

Hug your candle

Do your candles well in the middle??


After your burn your candles, do they look a mess?


How do you keep your candles looking like new between burns?


Show your candles some love!
Hug them after you extinguish them!!


Please extinguish candle before hugging your candle!!!!!!!

Once extinguished, let your wax cool slightly.  
Wrap your hands around your pillar candle, as shown above, and gently squeeze your candle back into shape. 
 Since you followed my last tip and only burned your candle 1 hour for each inch in diameter, while you are hugging your candle, the soften wax in the middle will raise up to be the same as the height as the edges, or very close to it.  
At this point you can smooth the edges with your thumb to make the top of your candle smooth and even.  
Your candle is now ready for the next burning.  


Monday, July 30, 2012

Burn time for your Pillar Candles


When Burning your Pillar Candles do they look like this?


Or do they look like this?


To stop your candles from burning unevenly or dripping there are a few tips that I can give you.

1st) when purchasing your candle make sure your wick is centered.
A wick that is off center will not burn properly and one side will get hotter than the other.

2nd) burn your pillar for 1hour per inch in diameter.  So if you have a 3" candle you should burn it for 3 hours. If you burn it less you will have 'welling' in your candle, if you burn it more you risk dripping and making a mess of your candle. 

Tomorrow I will let you know how to keep your pillar candle looking almost brand new :)

Any questions or comments please feel free to leave a comment below.  I will get back to you as soon as I can.

Thursday, July 26, 2012

Trim you Wicks!


Always trim your wicks to 1/4 inch, 
unless told differently by manufacture,
 ie. PartyLite's 3 wick and tealight wicks 
should not be trimmed for optimal burning.

Why should your wicks be trimmed??

1) This will prevent the candle from getting too hot and the wax will melt too quickly.  This will shorten the burn time of the candle and possibly crack the holder it is in. 

2) Wicks are made of organic materials like cotton and wood.  When these items burn they all create soot!!  When you keep your wick trimmed you reduce the amount of soot produced keeping your holder from turning black. 


Please burn your candles responsibly